I was shocked to find out how many people have an issue with drafty gas fireplaces. I was even more shocked to see how many people accept it as being normal or treat it with band-aid methods like stuffing pillows against the vents or hanging a blanket over the unit when it’s not in use.
Fireplaces are supposed to keep you warm when they are being used and leave you unaffected when they are not being used. If you have a drafty gas fireplace, there are a number of possible reasons, all with solutions.

If the pilot light is out, the supply air can cause a cold draft. Unsealed chimney chases create cold drafts from gas fireplaces. Improperly sealed vent pipes can be a source of drafts, as can gaps around gas supply pipes. Open flue dampers will allow cold air to flow through the fireplace.
Your Pilot Light Is Off
It may seem counterintuitive, but you want a gas fireplace to have a certain kind of draft in order to function.
This does not mean a gusty wind that blows into your room and cools down your house, but rather a minor draft that allows air to flow continuously into the fireplace to fuel the fire (remember that oxygen is vital to creating and sustaining a flame).
A pilot light is a way to manage the draft caused by the necessary influx of air.
It is a passive and relatively small flame that does not heat the room.
Instead, it is designed to just use the air entering the fireplace, reducing the amount traveling further and entering the room while the fireplace is unused.
Moreover, the air that is still entering the room will be slightly warmed. It won’t be so hot as to be noticeable, but it won’t be a cold draft, either!
Confirming This Is the Problem
Remove the front cover panel of your fireplace to expose the pilot light and see if it is on. It looks like a small gas burner with a small flame.
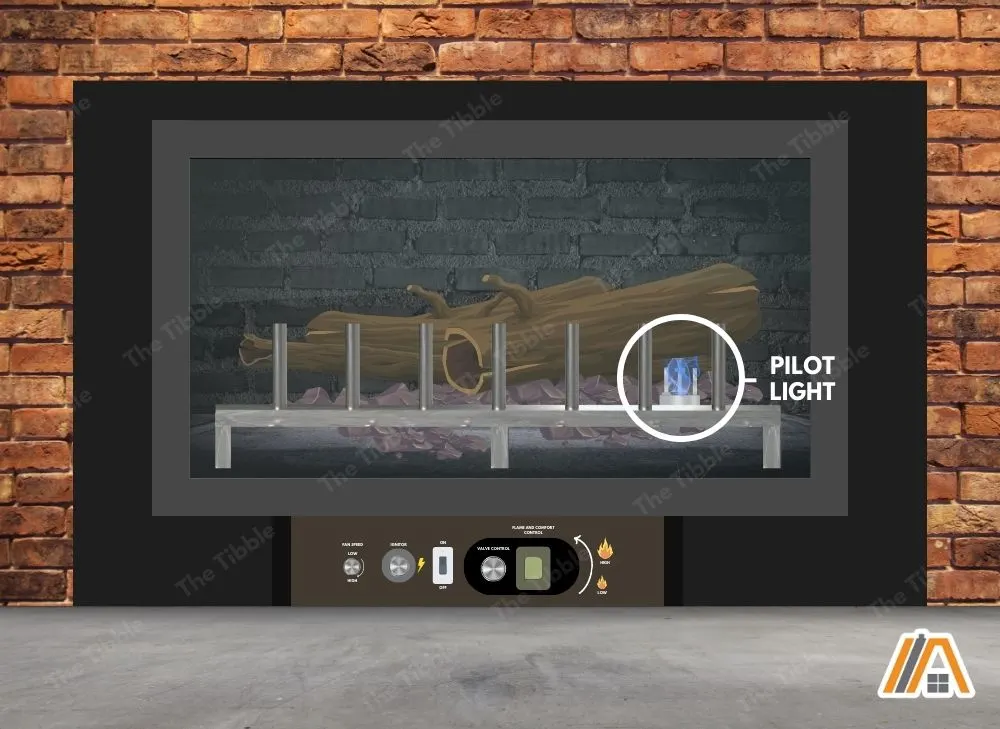
If you notice that your pilot light is off, relight it (we will explain how to do this in the next section) and see if the draft persists. If it doesn’t, you have an easy fix for your drafty fireplace.
The main downside of running a pilot light continuously is that gas costs money, so your bill can rack up steadily, costing about $10-$20 per month.
Solution
Your gas fireplace should come with specific instructions for how to relight the pilot light.
If you have lost the manual, try looking online for a digital copy.
The owners’ manual instructions should be followed unless they are not available. In that case, you may find the following generalized directions helpful:
- Locate the gas shut-off valve. Make sure this is turned on (the handle should be parallel to the gas pipes).
- Remove the glass doors of the fireplace as a safety precaution.
- Find the gas control dial and determine how you will light the pilot light. This will either be a small ignite button if your fireplace has one or you will light it manually, (a long match or long-barreled lighter or electric lighter should be used).
- Turn the gas control dial to Pilot.
- Press down on the dial while simultaneously pressing down on the ignite button or holding the lighted match or lighter near the burner
- If it does not light the first time, wait a few seconds before pressing the dial button again.
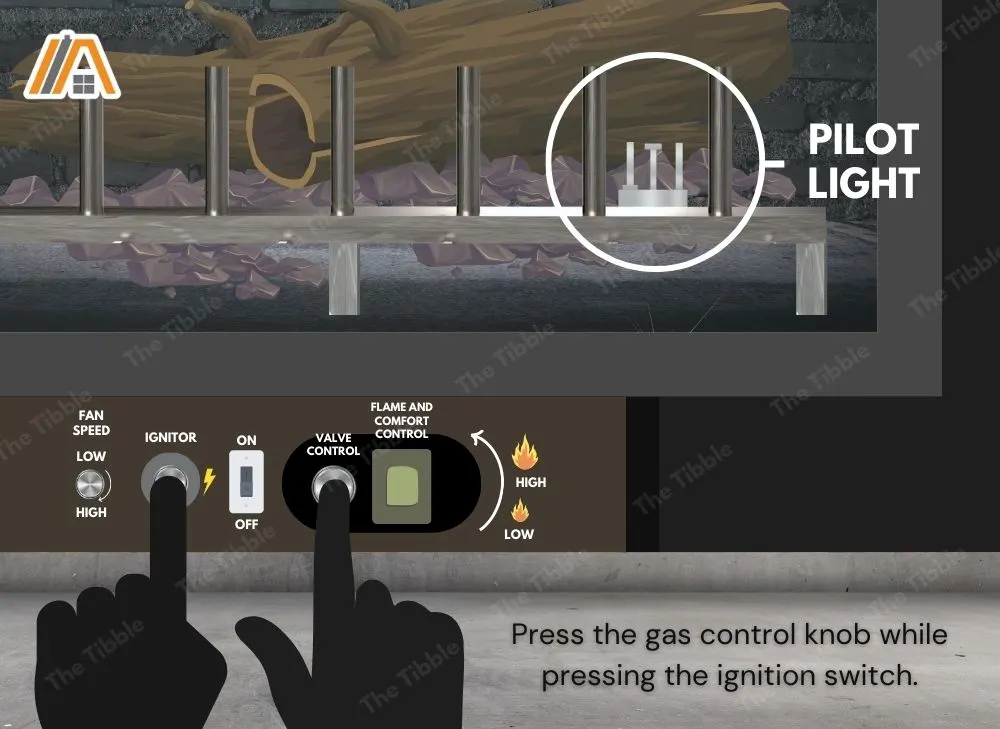
If you are more of a visual person, you can watch this video:
Chimney/Case From Old Fireplace Unsealed
Direct-vent fireplaces pull air in and vent air out the side of the house as opposed to through the chimney as do traditional wood- or coal-burning ones.
However, many homes with gas fireplaces originally had a traditional fireplace and this was replaced with a gas unit.
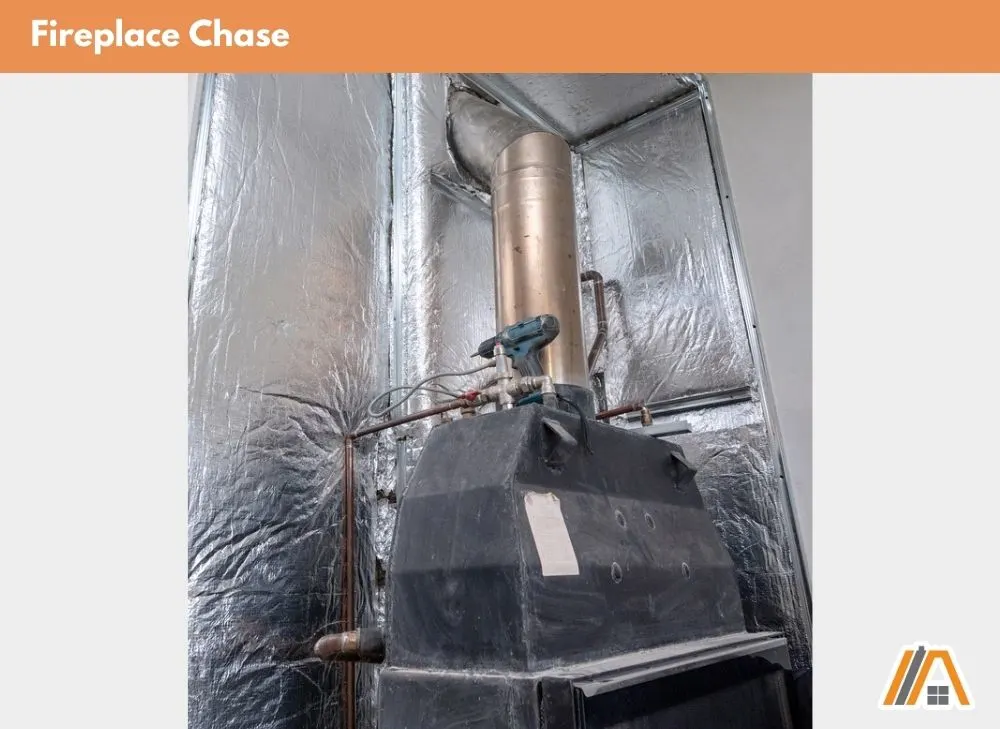
When this alteration was made, the chase (or chimney) should have been sealed with caulk along all of the edges and potentially insulated as well so that cold air would only come in through the vent pipe where it’s supposed to and nowhere else.
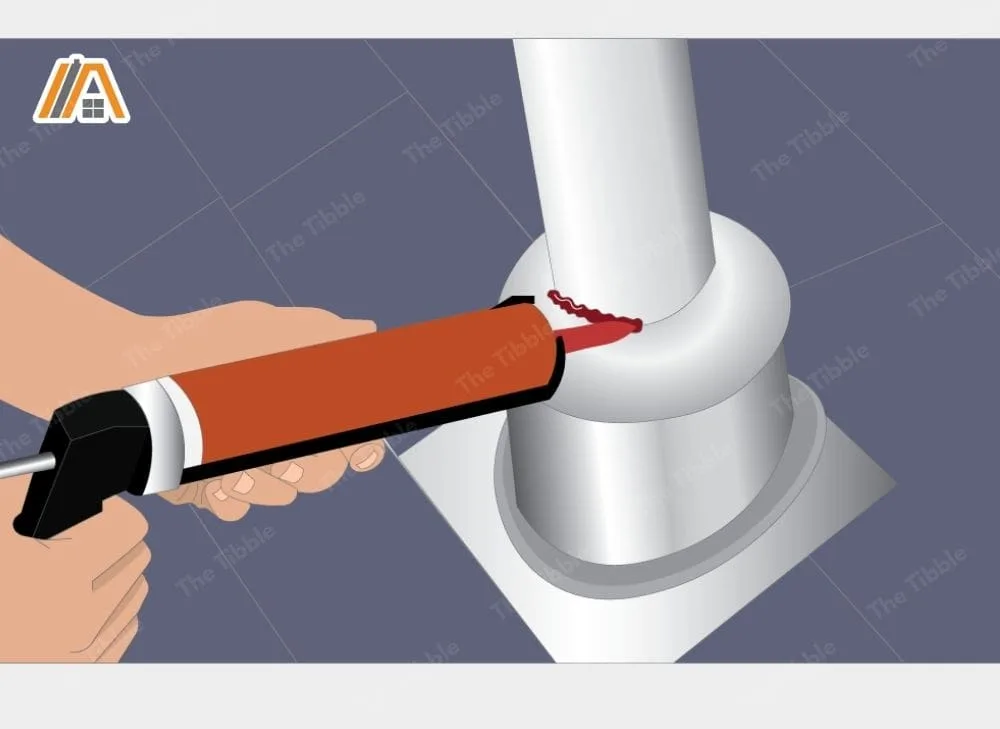
If the fireplace chase was not sealed properly, air will come in through both the vent pipe (normal and controlled) and cracks in the chase (uncontrolled and a cause of cold drafts).
Confirming This Is the Problem
If you suspect that the cold draft chilling your ankles may be due to an improperly sealed chase, it pays to investigate how your fireplace was installed.
You can consult with the builder to see what kind of sealant and insulation if any was used inside the chase, but this is only effective if the installation was done recently and by you. Only then would you know who to consult with!
Then there is still the chance that your contractor will say that they did everything right, even if they did not.
The best way to confirm that your issue is air leaking through the chase will be to remove your gas fireplace to access the chase behind it. The way that you installed the fireplace will determine how you will remove it for this purpose.
This task requires professional help, at least for the dangerous aspects, such as disconnecting the gas. It will also ruin the finish around your fireplace.
Once the fireplace is removed, check to see if the edges are sealed with caulk and/or foam insulation. Check for air leaks anywhere within the chase.
As you can see in the video below, the edges of the chase need to be sealed properly, and tape will not do the trick.
Solution
Once the fireplace is removed, there are a couple of ways you can ensure that the chase is sealed properly.
- One option is to spray the entire inside of the chase, including the corners between the floor and walls, with spray foam insulation.
- Alternatively, you can find the cracks that are leaking air and seal them with fire-resistant caulk (amazon link). You can opt to also apply wool insulation to the inside of the chase using a staple gun for additional draft resistance if necessary. This will depend on how cold it is where you live.
Fireplace Vent Pipes Unsealed
The chase is one possible source of air leaks, and the vent pipe is another.
The vent pipe will naturally have gaps at its connection points, such as the one at the fireplace opening and the one exiting the side of the house. These connection points need to be sealed with high-temperature caulk (amazon link).
Confirming This Is the Problem
First, consider contacting whoever installed your fireplace for information. If you can confirm that your vent pipes were sealed with caulk upon installation, you likely won’t have an issue with this.
If you cannot verify that they were sealed well upon installation, and have reason to suspect they weren’t, you’ll need to remove the fireplace to access the pipe and check if it is correctly sealed.
Once again, removing your gas fireplace will be the same process as installation, but in reverse order. It is highly recommended to contact a professional for this process.
Solution
Once the fireplace is removed, apply silicone caulk to where the vent pipe gets inserted into the fireplace.
This will ensure that the place where the metal of the vent pipe meets the metal of the fireplace does not allow any air to escape.
Apply caulk to the connection between the vent pipe and the pipe that exits the side of the house. This will be trickier since you won’t be able to see this connection once the fireplace is slid back into its place.
Make sure you apply a good amount of caulk to ensure a good seal.
Gaps Around Gas Lines
Another area with the potential for air leaks is the hole where the gas line runs through the chase and into the fireplace.
There should be a hole somewhere in your chase for the gas line to pass through as well as a hole in the firebox for the pipe to reach the burners. These holes will allow cool air to enter if they are not sealed properly around the gas pipes.
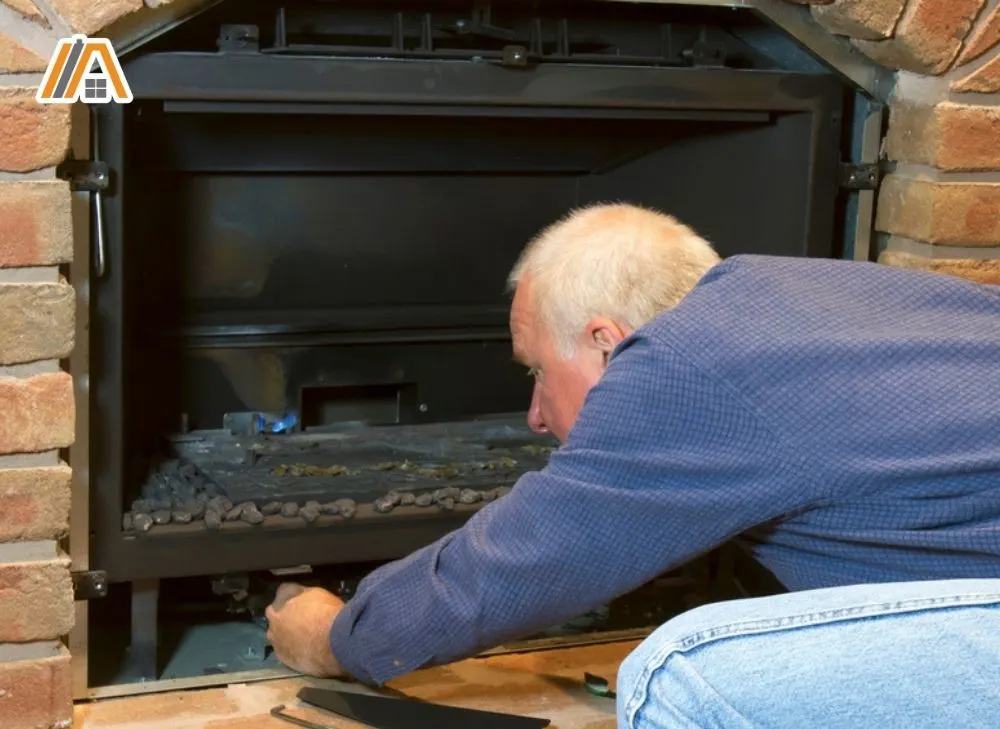
This is a surprisingly common problem, even in modern houses—and it’s not just fireplaces.
Anything that connects the outside with the inside through pipes, vents, and wires, including dishwashers, heat pumps, and wall mounted bathroom exhaust fans, has the potential to become a source of cold drafts.
Confirming This Is the Problem
To confirm this issue, you will, once again, be removing the fireplace for inspection behind the firebox.
There should be a hole in the back or side of the firebox where the gas line is run through. Check to see if this hole is sealed with anything. If it is, check to make sure the sealant has not developed cracks over time.
Then find the hole where the gas line comes into the chase itself. This hole should be sealed as well to keep the chase insulated and keep cool air out.
Solution
There are multiple ways to seal a gas line going into a fireplace. High-temperature caulk will do the trick, but you must be careful to fill all areas around the hole. Even the hard-to-reach areas are important to seal if you want it to be effective.
Refractory cement (amazon link) is also an option for sealing the gas line. This is a stiffer sealant that is less likely to have micro-cracks and let air in over time.
However, due to its heaviness, it has the potential to damage the gas line itself, which is a safety risk. It should be used with high caution in this application.
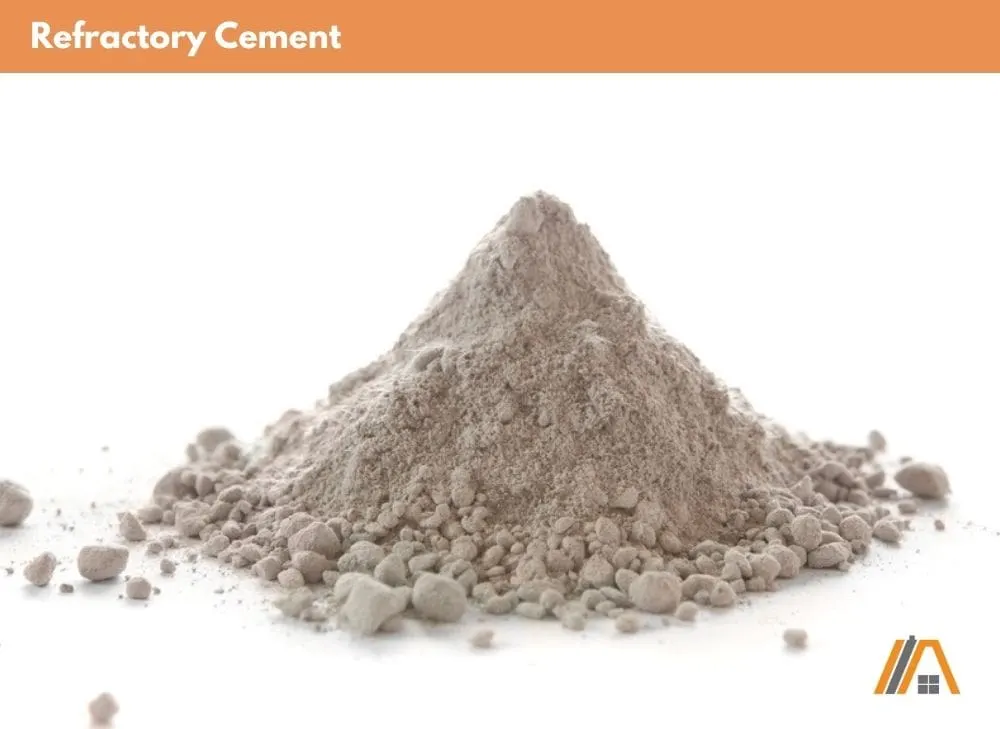
Due to the risks involved, sealing around the gas line is best executed by a professional to make sure the gas line is protected in the process of applying the sealant.
As for holes within the chase, spray insulation will likely be sufficient to fill them.
Permanently Open Flue
If the gas fireplace is vented through the chimney (as opposed to being direct-vented), then the flue damper might be permanently open to ensure no gases enter the home.
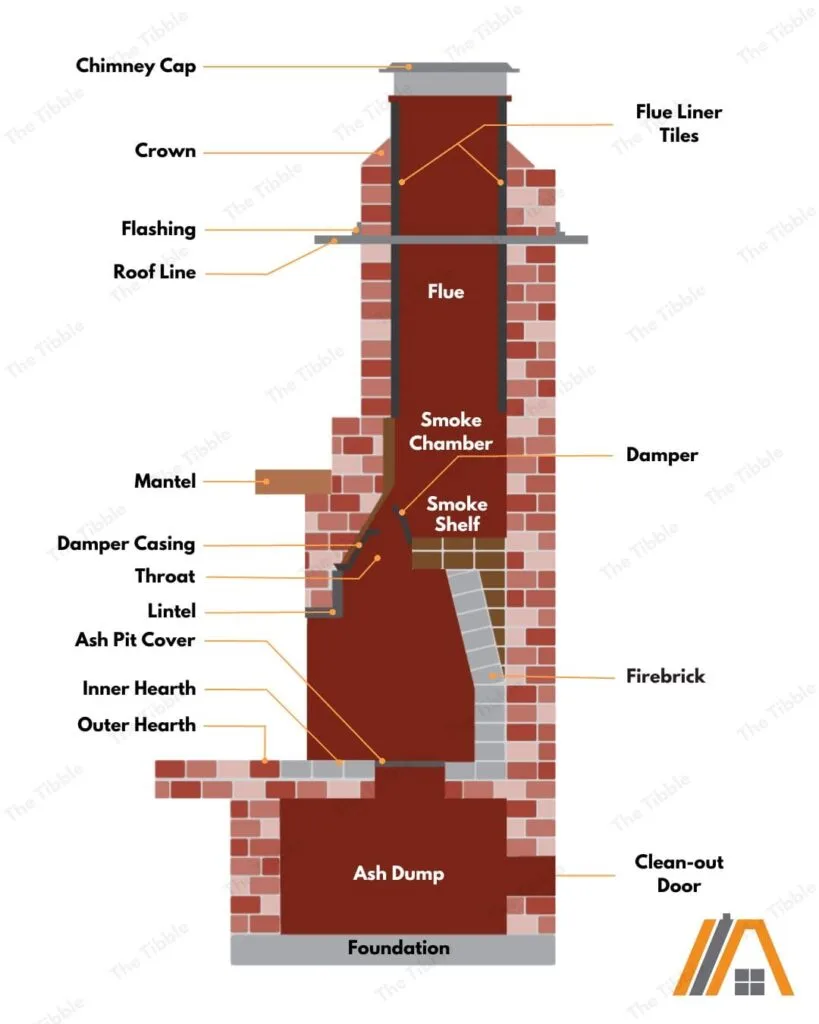
With a gas fireplace, it is important to have a way for the combustion by-products to escape. If you do not provide an external path, then they will simply exit the fireplace into the room you are trying to heat.
The danger of these gases is why ventless gas fireplaces are illegal in most countries, including Canada.
To ensure that gas poisoning never accidentally happens with vented gas fireplaces, many professionals will secure the flue damper in the open position. However, if your fireplace is not in use, then it causes a draft.
Dampers are actually a really good solution for cold drafts entering through any ducted system in the house including fireplaces, bathroom fans, and range hoods.
Confirming This Is the Problem
If you keep your flue damper open and have an open chimney, you can most likely bet that this is your issue.
With nothing blocking the chimney opening, cold air from outside is free to flow into the home through the fireplace.
If you do not have a flue damper at all, meaning the flue is always open, the same applies, and there are several products you can purchase to help prevent drafts.
Solution
If you have a damper in your fireplace, one method to prevent the cold draft is to close the damper when you do not have a fire going.
This can be accomplished by reaching up into your fireplace and closing the damper if the front screen is removable.
A non-openable front screen makes this a little trickier, but there will be a way to do it without too much mess.
Should your gas fireplace lack a damper altogether, then you can have one installed or you can try other chimney-blocking products such as a chimney balloon (amazon link) or a wool draft stopper called the Chimney Sheep.
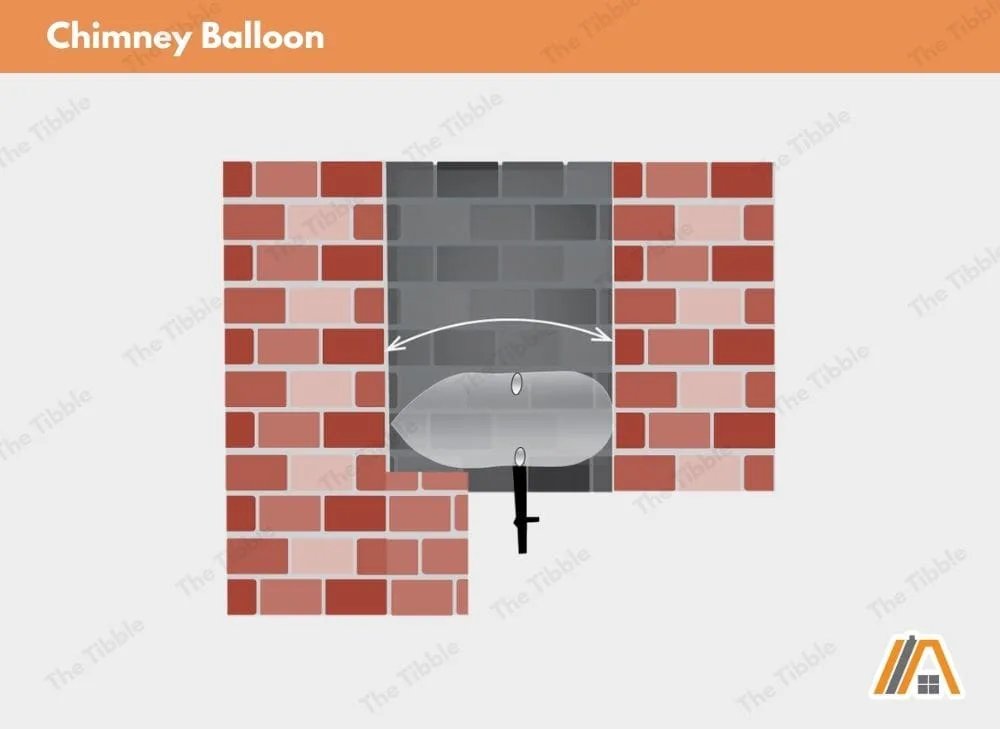
The most important thing to remember with this method is that the damper needs to be opened again or the chimney blockers removed before another fire is started.
Then there are the band-aid methods that I spoke about earlier.
You can purchase a fireplace guard (amazon link) or fireplace cover that you put in front of the fireplace’s opening between each fire.
This can be made of a wide variety of materials, but the most important thing is that it is thick to block out cold. Some material options include wood, wrought iron, and thick wool.
Sources
https://fireplaceconceptslex.com/blog/how-to-light-your-pilot/
https://findanyanswer.com/open-detail/658375A14
https://www.heatnglo.com/ideas/venting-explained#
https://www.airpurelife.com/how-to-insulate-a-gas-fireplace-chase/
https://newbuckchimney.com/sealing-around-gas-lines/
https://buyersask.com/furnaces-acs-fireplaces/fireplace/gas-line-not-caulked/
https://fireplaceuniverse.com/fireplace-draft-stoppers-excluders/

