The buttery smell of popcorn, the relief of a quick meal on a busy day, the hope of a thrice-warmed cup of coffee for a new mom. These are the types of sensations you should experience when opening your microwave. Not the waft of a cold draft!
Any connection between the inside and the outside of your house is a potential route for cold air to come into the house. So, vented microwaves can become drafty. The good news is that there is likely only one problem, and that problem is readily fixed.


Cold drafts from microwave vents typically result from a damper that cannot close properly due to a blockage, fault, or wear and tear. If the damper is damaged, a new one can be installed for $20-$60 as a DIY project.
Most Likely Problem Is With the Damper
Venting your microwave to the outside helps to remove cooking smells and keep the indoor air quality as good as possible. But a route leading out of the house has the potential to be a route leading into the house, and the only thing standing in the way of this backward passage of air is a damper.
A microwave damper has rectangular metal plates or flaps that only open in one direction. It works similarly to a valve or a dam, letting air out of the system and controlling what air can get in.

Microwave dampers fall into the category of backdraft dampers, meaning that their main job is to prevent unwanted air from coming in—backdrafting.
The force of the hot air traveling through the vent from the microwave pushes against the spring-operated flaps, which open and allow the air to leave through the terminal vent.
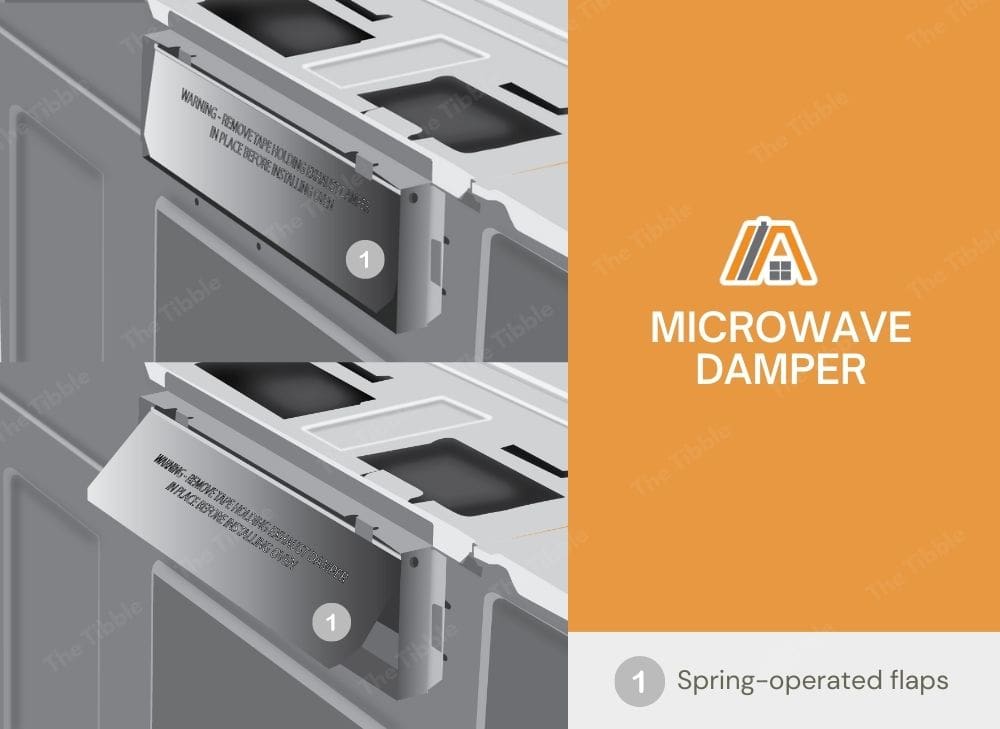
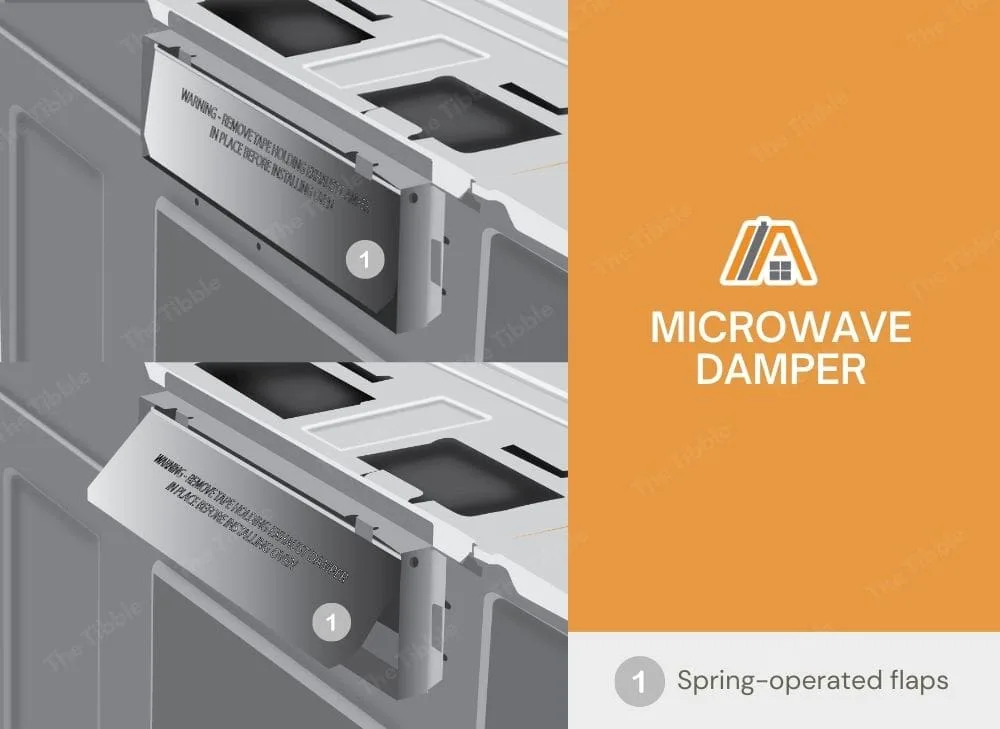
Once the air is exhausted (the microwave stops), the pressure against the flaps ceases, and they close again.
As they are one-way flaps, pressure from outside air will not be able to open them in the opposite direction, so properly-functioning dampers keep cold air out.
When the damper is not functioning properly, outside air can somehow get past the damper, resulting in cold drafts. This uncontrolled outside air can ruin the temperature that you’re trying to maintain indoors.
Ways That Dampers Stop Working
Blades Warp or Crack
Blades are the most important part of a damper. Microwave dampers typically use a single blade, but some types of backdraft dampers have multiple blades.
The damper’s effectiveness hinges (pun intended!) on the blades being able to tilt between the open and closed positions.
Blades can warp, crack, or get knocked out of alignment.
Warped or misaligned blades will not be able to close fully. Cracked blades similarly will not move as intended and can let air in through cracked or broken areas, even when in the closed position.
There are various causes for malfunctioning blades. The biggest one is that microwave dampers tend to be made of light, sometimes cheap, metal, which bends easily.
Over time, regular exposure to heat and temperature changes can also compromise the metal damper.
In an ideal world, your microwave damper should last for the lifespan of the appliance. But if your microwave is particularly old, you got a dud damper, or some unfortunate circumstance caused damage to your damper, you can easily obtain a replacement part (we’ll discuss replacement later).
Springs Fail
The highest-quality dampers will typically have a low-tension spring. This spring holds the damper closed and prevents it from squeaking and flapping in the wind.
Not all microwave dampers have a spring, though, and that itself might be your problem. Cheaper dampers tend not to have springs, so check online reviews and specifications to make sure that you buy a replacement damper with a spring.
If you do have a spring-loaded backdraft damper, the spring is another potential failure point. Springs can fail due to too much stress or the use of cheap materials.
Still, blade warping seems to be a much more common problem than spring failure.
Seals Fail
Seals are affixed to the edge of the blades to fill the tiny gaps between blades. The metal blades can’t fit exactly together, so they need a more flexible material to overlap with the closed blades.
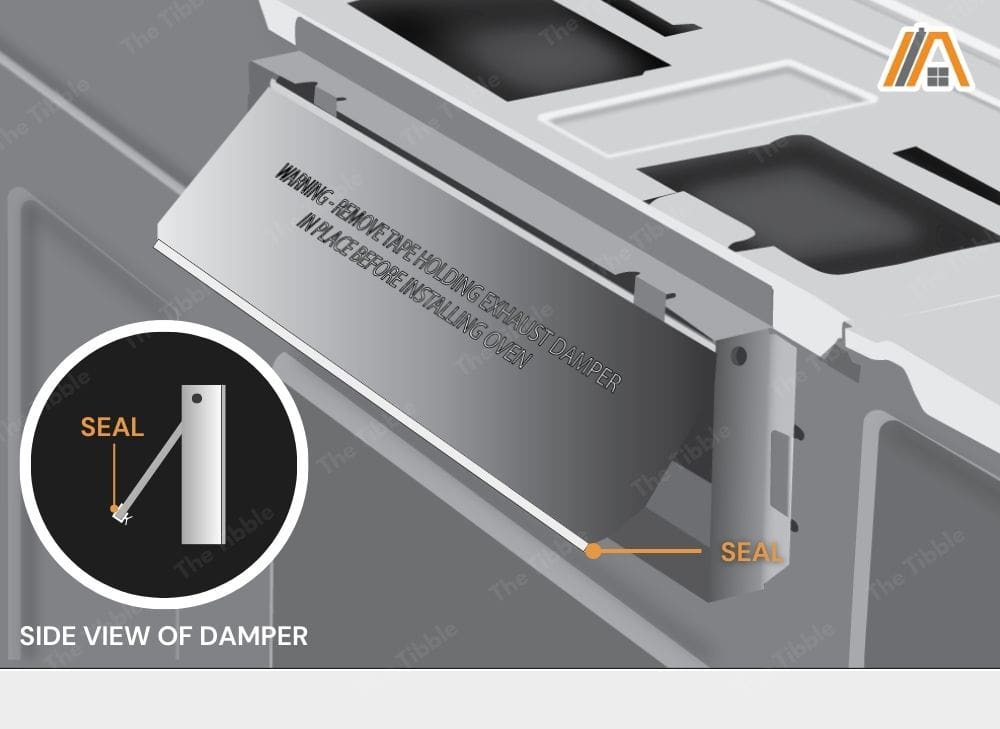
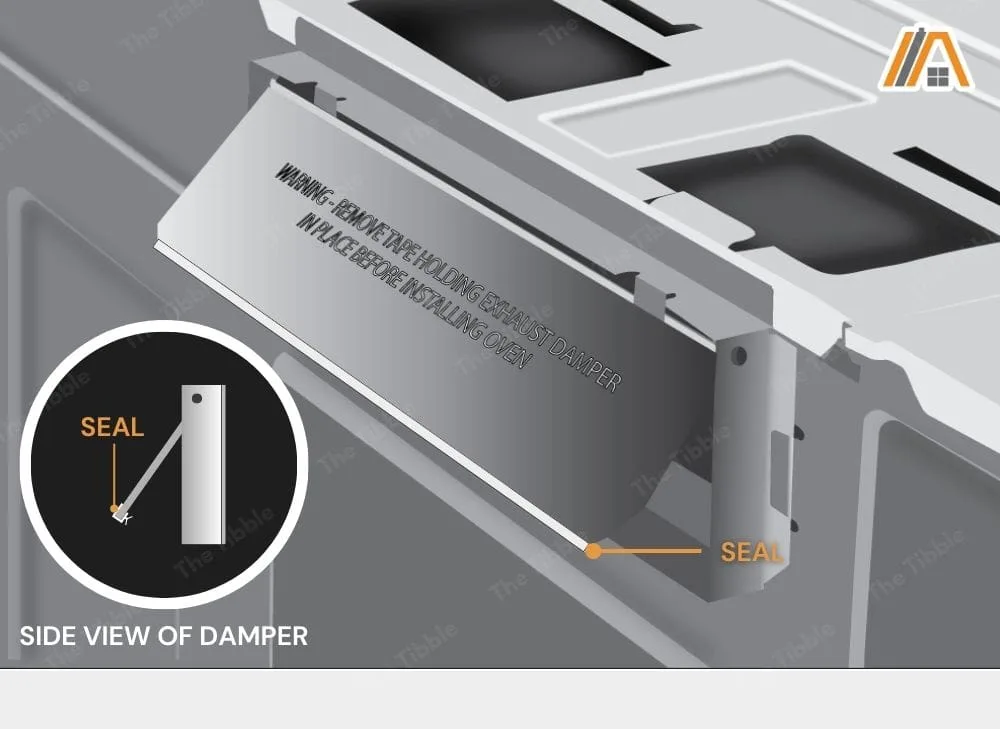
Seals are typically made of polyurethane, extruded silicone rubber, vinyl, or neoprene, all of which can handle being compressed every time the blades close. Still, even seals wear down over time.
Without effective seals, the damper will rely entirely on blades and air pressure differentials to prevent air from entering your kitchen. Blades close pretty well by themselves, but they need good seals to make them airtight.
Still, not all microwave dampers have detachable seals or even seals at all. Most microwave dampers tend to be designed as simply as possible.
However, there is another seal that needs to be considered. This is the one around the actual damper unit, not just the blades.
This seal is to prevent air from squeezing between the damper and the duct. It can be a rubber seal, or it may just be a line of caulk.
Obstructions Keep Blades Open
One of the most common (and easy to fix!) problems is that the damper blades are obstructed by something. This could be anything from debris to dead bugs.
Because the duct is vented to the outside, insects and organic materials can blow inside and get to the microwave damper.
If these small obstructions get stuck under the damper blade, the blade cannot seal or sometimes even close at all, leaving a significant gap for drafts to enter.
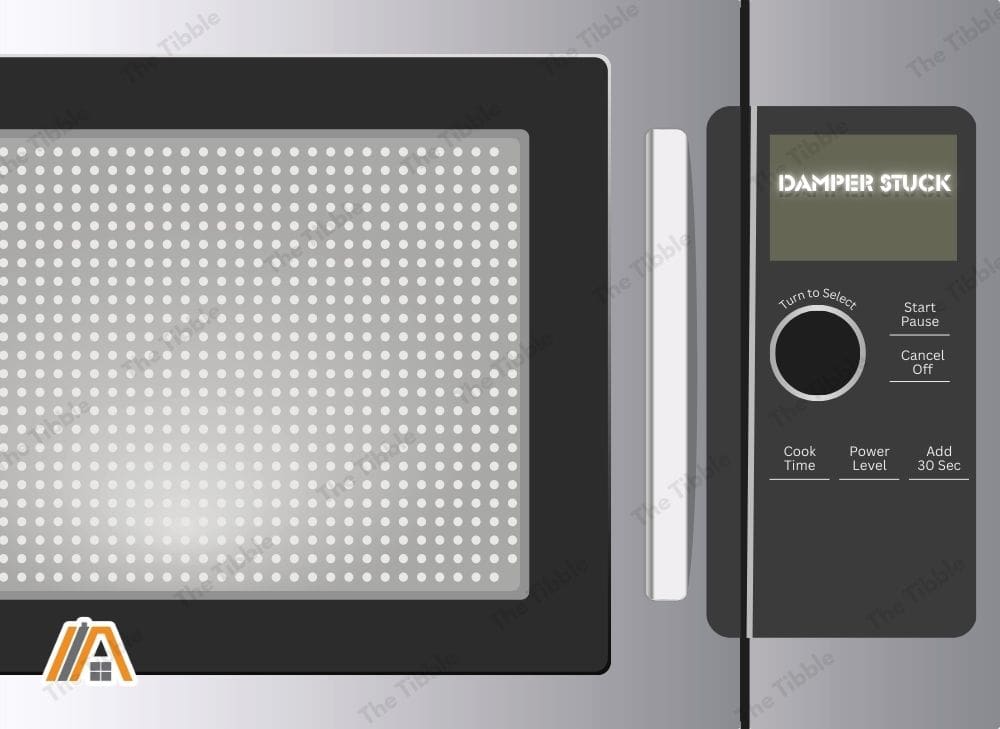
Some microwaves, like certain GE Appliances models, will even display a “Damper Stuck” message on the control panel if it gets stuck in the open position.

Solutions
Repair
The problem with repairing microwave dampers is that they are a small, simple, and fairly cheap type of damper, so people tend to replace rather than repair them.
Most of the above problems can’t be easily repaired. For example, you can’t bend warped blades back into shape with enough precision for the blades to seal. You typically wouldn’t even replace the blade individually but rather buy a whole new damper.
The only case in which repair makes sense is if the damper is obstructed.
To inspect your microwave damper for obstructions, first disconnect the appliance from the power supply.
If your microwave is installed in a wall, you will probably need to remove it. Refer to the manual to do this safely.
You can also refer to the first part of DIY damper replacement videos, which will instruct you on how to uninstall the microwave.
Then, visually inspect the damper for obstructions and other signs of wear. If there is a small obstruction, you should be able to remove it to restore the damper to its original effectiveness. Check that the obstruction did not warp the blades in any way. Otherwise, you’ll need to replace the damper entirely.
Partial or Complete Replacement
When it comes to replacing microwave dampers, it’s often easiest to replace the whole damper instead of replacing individual parts.
First of all, if you’re replacing the damper as a DIY project, it might be difficult to determine which individual part is causing the issue.
Secondly, if the damper has had enough wear and tear to damage the spring, it’s likely that other parts of the damper are also damaged.
Given the minor price differential for whole dampers vs. parts, it’s easiest to replace the whole thing rather than spend time and money troubleshooting if you end up needing to replace multiple parts.
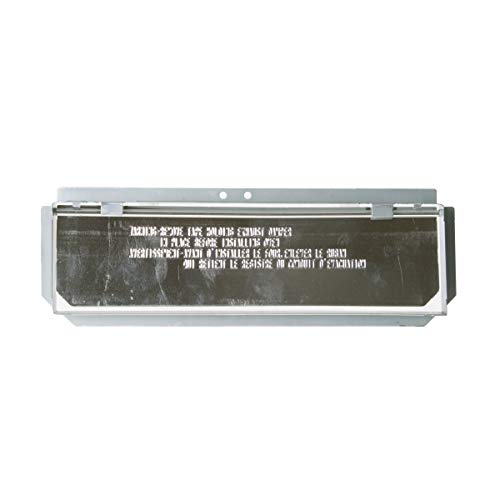
- The GE Appliances WB06X10436 Vent Damper is a genuine OEM (Original Equipment Manufacturer) part designed and engineered to exact specifications
- Replacement GE Appliances Microwave Vent Damper is attached to the outer cabinet and directs airflow through the vent duct
- GE Appliances WB06X10436 Microwave Vent Damper is also called the Hood Damper Assembly
- High quality GE Appliances OEM WB06X10436 Microwave Vent Damper is manufactured with premium materials for durability and exact fit, be sure to follow instructions in owners manual when installing...

Last update on 2024-03-27 / Affiliate links / Images from Amazon Product Advertising API
Additionally, it’s difficult to find damper springs sold separately. You can find some miscellaneous “microwave springs” online, but they tend to be for hinges, and it’s difficult to identify which models they are designed for.
In theory, seals would be easy to replace. Other types of HVAC dampers are designed so that old seals can be peeled off and new seals can adhere. However, the fact that microwave dampers are lower-tech means that seals are not usually sold separately. Not all dampers even have seals.
If the caulking around the damper unit is worn or missing in places, it’s worthwhile laying down a fresh bead and seeing if this works.
With the exception of the caulking, if a part needs to be replaced, you will probably need to replace the entire damper.
Replacement dampers range from $20-$60.
Ideally, you should purchase a damper designed for your model number from the manufacturer or from a home improvement store.
There is some overlap between models, so at a bare minimum, make sure the dimensions match.
You can install the damper as a DIY project. Make sure you unplug the microwave or turn off its circuit breaker before doing anything.
You’ll need to take the microwave off the wall, referring to the manual. The damper is usually located on top of the microwave.
Remove the screws holding the damper in place. The damper will either lift or slide out.
Place or slide the new damper into position and secure it with screws.
Taking the microwave off the wall will be the most time-consuming and difficult part of the process. Otherwise, it’s very straightforward.
Temporary Solutions
There are many reasons why you might need a quick fix. It takes two people to safely lift a microwave, so if you live alone, you’ll need to wait. And if you order online, you’ll need to wait for the new damper to arrive.
All this waiting can be intolerable if it’s winter and your kitchen is freezing!
In the meantime, you can cover the vent. You’ll get the tightest seal if you use plastic wrap, a plastic bag, or a garbage bag, and seal the edges with painter’s tape or duct tape.
You can also affix duct tape directly over the vent.
Another option is to cut a piece of thin board to the dimensions of the vents and use magnets or magnetic strips to attach it to the vent. This creates less of a seal than plastic and tape, but the homeowner who tried it said that the amount of cool air was still “manageable.”
, 07518")
However, you won’t be able to use the microwave as it won’t be able to vent safely.
That means that plastic and tape are very short-term solutions. Put a sign or post-it note on the microwave to remind everyone in the house that the vents are covered!
In all cases, you will eventually need to inspect and probably replace the damper.
Sources
https://homeguides.sfgate.com/prevent-draft-microwave-vent-34956.html
https://todayshomeowner.com/general/guides/backdraft-dampers/
https://newsstand.mcdlg-hvac.com/condenser-closer-look-blade-seals