This sauna represents my father’s deep-rooted connection to sauna culture, stemming from his childhood experiences in public and traditional smoke saunas.
Built entirely by his hands between 2013 and 2014, relying on materials sourced from his own forest.
Sauna isn’t just a structure for him; it’s an integral part of his life, offering a sanctuary from the hustle and bustle of daily life, shaping his routines, and providing moments of tranquility.
The Tibble Sheet
“The Tibble Sheet” is your ultimate source for delving deep into the specifics of each sauna featured on our website. We provide comprehensive breakdowns, covering everything from heater type and bench layout to insulation details and dimensions.
Curious about how long it takes for the sauna to warm up or its square footage?
Look no further – all the information you need is right here on The Tibble Sheet.
Our goal is to empower you with the knowledge to understand what sets each sauna apart. Whether you’re a seasoned sauna enthusiast planning your own build or simply intrigued by sauna culture, The Tibble Sheet offers valuable insights in an easy-to-understand format.
The majority of items are clickable for your convenience. For instance, simply clicking on “Lighting” will instantly direct you to the relevant section dedicated to lighting details.
| The Tibble Sheet | |
| Location | Indoor |
| Construction method | Completely custom |
| Pro/DIY | DIY |
| Heater Type/Model | Wood Fired / Custom |
| Heater Capacity | Approx 15 kw |
| Sq.ft. | 30 |
| Cubature | 212 cu ft |
| Dimensions | 7′ 3″ x 4′ 1.5″ |
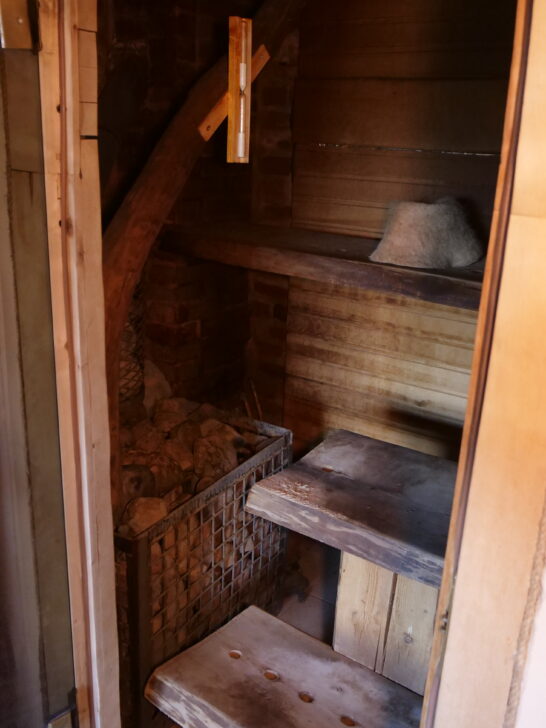
| Bench layout | L |
| Insulation type | None / Loose fill cellulose on ceiling |
| Insulation thickness | 12″ |
| Walls | STP 15×90 Aspen Untreated |
| Bench | Natural Aspen Plank One piece |
| Floor | Concrete-tile |
| Ventilation | Natural (Option for mechanical) |
| Lighting | Led strip |
| Door Type/Model | Glass round top. 2.03′ x 5.97′ |
| Window | – |
| Time to operating temperature | 1 hour to 176F 1.5 hours to 203F |
| Max temperature | 248F |
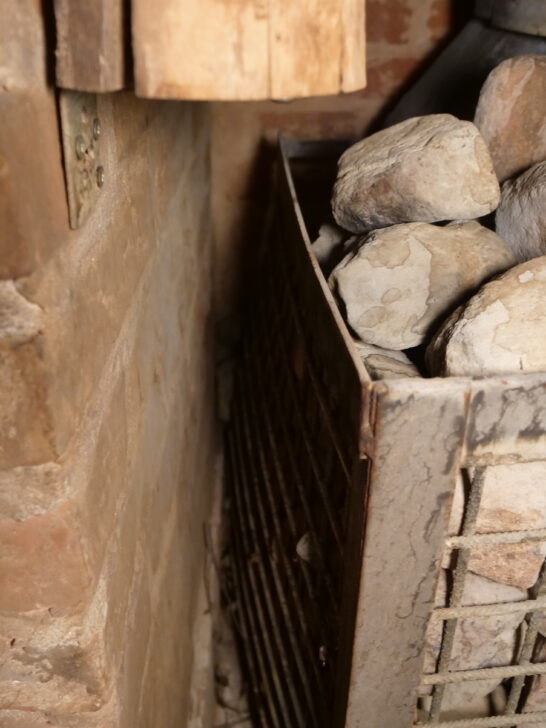
| Stone Quantity and Type | Field stones 330 lbs |
| Use Frequency | 3 times a week |
| Built (Year) | 2014 |
| How many people fits | 2 very comfortably. 4 tight fit |
| Additional Features | |
The Story Behind the Sauna
This sauna embodies my father’s lifelong devotion to sauna culture, tracing back to his childhood visits to public saunas and traditional smoke saunas at his grandparents’ home.


Constructed entirely by him between 2013 and 2014, it reflects his meticulous craftsmanship and resourcefulness, utilizing materials sourced from his own forest.
Origins and Inspiration
This sauna is really special because it belongs to my parents. It’s mostly my dad who uses it.
Sauna isn’t just something he does once in a while.
It’s a big part of his life.


He’s been going to saunas since he was little. When he was a kid, he went every week to a public sauna.
In the summer, he’d visit his grandparents and enjoy the smoke sauna there. Sometimes, they used the smoke sauna for smoking meat.
He built his first sauna over 3 decades ago. Since then, he’s been going about three times a week.
He can’t imagine life without it. So when it came to building one, it wasn’t a question of whether to do it. The only question was where and how quickly it could be done.
Design Influence
The materials and design of the sauna were mostly inspired by what was available.
He chose thick planks for the benches. (Almost 3″ thick) This keeps them cooler for longer, making sitting more comfortable.

Personal Philosophy
Sauna time is special for him. It’s his way to unwind and feel great. Every time he knows it’s sauna time, he feels excited.
It’s like a little escape from everything else. Just stepping into the sauna brings him a sense of calm and anticipation.
Construction Journey
Who Built it?
My father built the sauna entirely by hand, from scratch.
He didn’t just build it, he created everything from scratch.
He went to his own forest, felled the trees, and used his sawmill to cut the planks. Then, he dried them and used them in his sauna. Even the wall paneling is made by him, from his own wood from his forest.
Except for the door glass and screws, nearly everything in the sauna is homemade. My father crafted every detail himself, preferring his own work over store-bought items.
When Was it Built?
Between 2013 and 2014
Building Challenges
The hardest part was adjusting the heater’s size. Originally, it was almost double the length needed for this sauna. So it had to be cut it and then welded it back together to fit perfectly into the sauna room.


It took a lot of trial and error to make it work.
Distinctive Features
This sauna is special.
It has lots of unique things. First, the benches are different. They’re not like regular benches.
They’re made from one big piece of aspen plank.

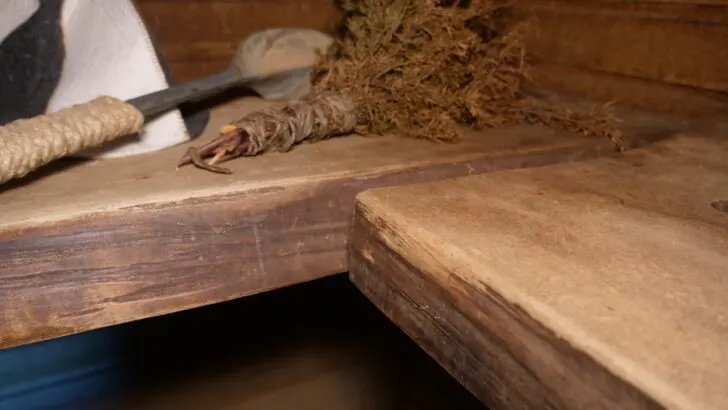
The door is interesting too. It doesn’t have a normal handle. Instead, it has a handle made from a branch.
It looks cool and rustic.


And there’s something else cool about this sauna. There’s a big branch inside. It’s placed diagonally. This branch acts like a shield. It stops people from accidentally falling onto the heater.
Safety is important, especially in a sauna.

In Hindsight
The century-old house had charming rustic ceilings, posing a challenge for sauna construction. Aluminum foil vapor barrier couldn’t be used on the sauna side ceiling without hiding the original ceiling planks.

Even with 12 inches of loose fill insulation in the attic above, the sauna loses heat due to lack of airtightness.
Later he realized a vapor barrier should have been installed on the attic side before installing the insulation.
To fix this, he plans to add a vapor barrier and redo the ceiling with juniper planks. However, he’s delaying this project due to ample firewood supply from his forest.
Advice for Others
- For easy cleaning avoid fixed structures touching the floor.
- Design benches to be removable so you can hose down the entire sauna.
- It’s crucial that all wood details don’t touch the floor. Leave at least a 10 cm gap to prevent wood from getting too wet during washing and to facilitate drying.
- Make sure the floor is sloped towards the drain. More is better here.
Build Time
Total Duration
It’s hard to tell exactly how long it took to build the sauna.
As soon as he installed the heater, he couldn’t wait to start using it. So, even before everything was complete, he began enjoying it, sitting on whatever benches were available at the time.
Then, he continued working on it bit by bit, finishing different parts in stages.
It was more about enjoying the sauna experience rather than rushing to complete the entire construction all at once.
Heating System
When continuously feeding the fire with small firewood, it takes around 1 hour to reach 176°F and an hour and a half to reach 203°F.
Usually, it takes much longer since he uses large pieces of firewood that don’t burn as well.

The reason for the relatively long heating time is due to the large amount of stones on the heater and the uninsulated brick walls.
There are two sides to the coin here.
Sure. It takes longer to heat but due to the large amount of stones on the heater the heat is even and gentle. It can be compared to smoke sauna.

The uninsulated brick walls act as heat accumulators, releasing heat to surrounding rooms. This is beneficial, especially since the house needs heating most of the year.
Heater Type/Model
He modified the heater, shortening its firebox by half. The walls are made from thick steel, much heavier gauge than commercially available options.

This robust heater has been used regularly for the past 10 years, three times a week. (1500+ firings and 4500+ sauna sessions)
Only recently did it burne through and required welding.
Heater Capacity
It’s hard to determine the exact heating capacity since the heater is custom-made.


Based on the size of the firebox, it’s estimated to be around 15 kW.
Safety Distances
For walls the safety distances are not really relevant since they are made out of brick. Still there is quite a gap between the walls and heater. This is so the heat can spread more easily. At least 4 inches all around.
The bench is quite close to the heater all around.
The bench is positioned quite close to the heater all around, but this isn’t a problem.
The large volume of stones on the heater acts as a buffer. With plenty of stones between the firebox and the wood, it prevents the wood from becoming dangerously hot.
The bench does not show any signs of burning or darkening near the heater.
Chimney
Red brick chimney straight up.
An uninsulated steel pipe connects the heater to the chimney.

Construction
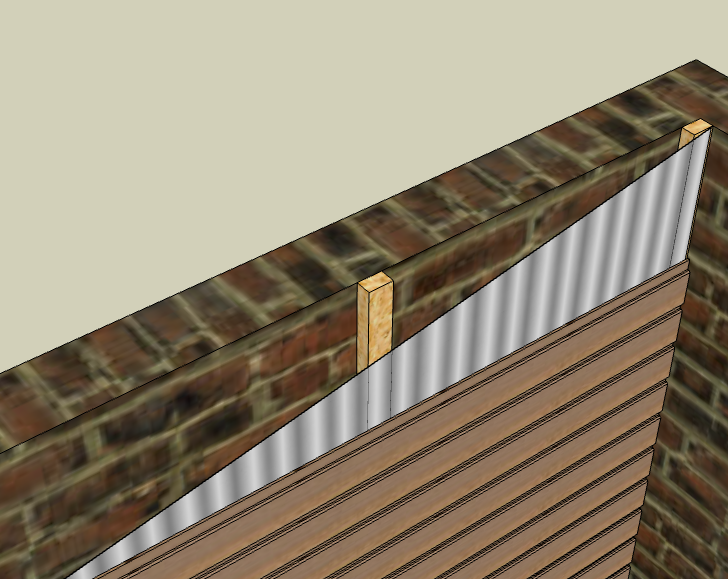
The sauna room load bearing walls are made out of red bricks.
Two of the walls display the natural charm of exposed brick, adding character to the space.


The walls behind the bench are covered by aspen STP 15×90 paneling. There is an 25mm air gap between the bricks and panelling. The aluminium foil vapor barrier is installed directly beneath the panelling.
All the wood details in the sauna were very dry. There were no signs of mould or moisture damage.
Floor Plan & Dimensions
Ceiling Height: 239 cm
Bench heights and dimensions can be found under the bench section.

Insulation
The ceiling has 12 inches of loose fill insulation, while the brick walls have no insulation.

Since all walls are interior no heat is lost during the heating season. The bricks absorb and store heat and release it slowly for up to 24 hours after the sauna has cooled down.
There is a downside to this.
During summertime the house gets quite warm. If the walls were insulated the heat could be ventilated out and the house would remain cooler.
Vapor Barrier
Aluminium faced paper vapor barrier in the walls A and B. (See layout sketch)
Nothing on the ceiling or other walls.
Floor
The concrete floor of the sauna is tiled with slip-resistant tiles for safety.
The tiles extend up the walls by 6 inches to protect the lower wall paneling from moisture damage.

This precaution ensures that the paneling remains dry and in good condition.
Upon inspection, the paneling near the floor was found to be exceptionally dry, indicating effective protection against moisture.
Drain
There is no drain inside the sauna room itself. However, there is one right outside the door. It is possible to hose down the floor and then scrape the water to the drain outside. The lack of extra drain inside the sauna room has not proven to be a problem.

The floor lacks sufficient slope, causing water to pool near the wall instead of flowing towards the drain.
Door

The door is a round-top Harvia model. The door jamb is handmade by my father.
Glass size: 24.41″ (620mm) x 71.65″ (1820mm)
Door opening: 32.28″ (820mm) x 81.89″ (2080mm)
Round top radius: 15.75″ (400mm)
Door jamb distance from floor: 5.91″ (150mm)
Door jamb measurements: 3.94″ (100mm) x 2.36″ (60mm) (untreated aspen)
While the door jamb has started to show signs of cracking. It surprisingly fits this sauna. It adds character and looks like it was designed to look this way.
Especially looking from the inside.

The photo shows a big gap under the door jamb, which was purposefully designed to protect the untreated wood from water damage. You can see how the door jamb looks after 10 years and 3000 sauna sessions.

This demonstrates that the steps taken to safeguard the untreated wood have effectively prolonged its lifespan.
If the door jamb had been touching the floor, it would probably have rotted by now.


Ventilation
The sauna relies on natural ventilation.
Two 4-inch (100mm) outlets in the ceiling. They are routed outside via rigid galvanized steel air ducts. There is an option for mechanical ventilation but it has never been used.
Fresh air enters the sauna via the huge gap under the door (5.91 inches or 150mm)

The outlet directly above the heater remains closed, while the other is slightly open. Adjusting the round vent to about half an inch ensures proper ventilation without cooling the sauna excessively.

As you know there is no aluminium-faced vapor barrier on the ceiling. This means likely lots of air leaks through the ceiling. The same amount of fresh air is being drawn in from under the door. To some degree, this contributes to ventilation.
No moisture damage in the attic, but it is huge and not very airtight. (1000 sq ft + high ceiling).
Paneling
In this sauna, there’s minimal paneling, covering only two walls. The paneling used is untreated aspen with an STP profile, specifically STP 15×90.
Being untreated, it’s refreshed occasionally by sanding.

There is a 6-inch (150mm) gap between the paneling and the floor. This is to protect it from moisture. See the picture under the floor section.
Bench
There are three levels of benches. The middle bench is often used by children since the temperature on the top is too much for them.

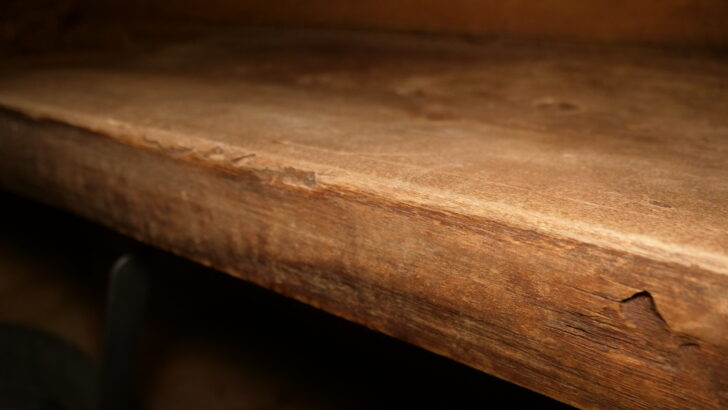
The sauna bench is made from solid aspen planks, each measuring a substantial 7 inches in thickness. The reason for their thickness is to maintain a more comfortable sitting temperature for longer.

Surprisingly, the entire bench comprises only four of these robust boards.
Since such wide planks will naturally curve over time holes are drilled into the middle to prevent sweat and water from pooling.

Bench dimensions
Since the bottom benches are tucked under the top ones I will list their dimensions on separate sketches.
Here is the top bench.
