How a fan is mounted affects not only its appearance but also influences its performance. Although flush mount installation has its merits, downrods are the preferred method of mounting ceiling fans because of their versatile applications and improved air circulation.
Whether a fan can be converted from flush mount to downrod installation is dependent on a couple of factors. In this article, I explain all you need to know about converting a flush mount ceiling fan to a downrod installation.

Flush mount ceiling fans can be converted into downrod ceiling fans with a conversion kit. Some are dual-installation fans and won’t require the conversion kit. The wiring has to be long enough to change the installation and the room has to be tall enough.
Requirements for Installation Conversion
It is possible to convert a flush mount fan into a downrod fan, but not all fans are designed for this adaptation.
In addition, factors like the height of the ceiling and the wiring would determine if the fan can be installed with a downrod.
Somewhere to Attach the Downrod
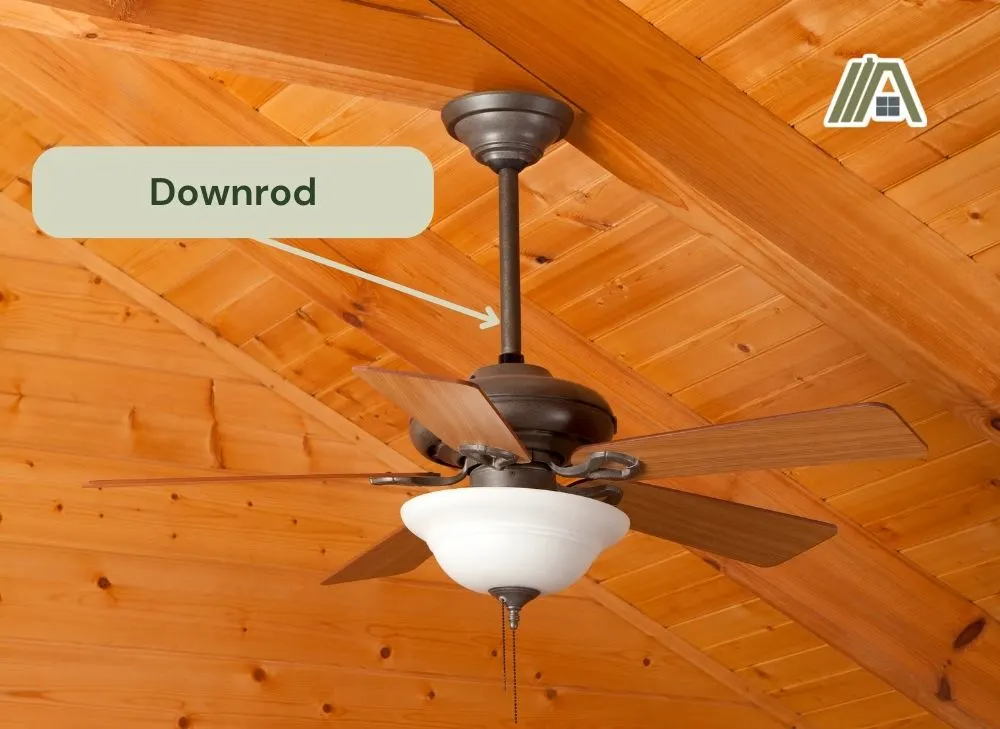
Downrods connect the body of the fan with the mounting bracket, which is secured to the junction box.
Ceiling fans that can be installed with a downrod have a hole at the top of the motor where the rod can be connected. This slot can be threaded or unthreaded to match the downrod’s design.

It’s impossible to create a hole in an already purchased unit because attempting to cut a cavity in the motor can cause damage to the motor, and the fan would not work or may end up being very dangerous to use.
Also, the hole is designed so that the rod fits snugly into the motor. This ensures that it remains firm and is able to support the weight of the fan even when it is running at high speeds.
The other end of the rod is connected to a mounting ball, which is installed into the mounting bracket.
If your current installation bracket cannot house the mounting ball, you can purchase one that has a slot where the ball can be inserted.
But if there is no place for the downrod to attach to the fan body, then you cannot convert the installation.
Sufficiently Long Wires
During ceiling fan installation, the wires from the motor are connected to the house wires in the junction box.
With flush mount installation, the wires are connected directly from the fan’s motor to the ground wires. So, some installers cut excess wiring short to achieve a snug and easy installation.
With downrod installations, the wires have to pass through the length of the rod. As a result, they require longer wires.
Most ceiling fans that are compatible with downrod installation come with wires long enough for an average-sized downrod. But if these were trimmed when the fan was installed flush, then you would have to replace or extend the wired to accommodate the downrod.
To extend the wires, you need to purchase wires that match the gauge of your fan’s wiring and then attach the extension wires with the corresponding fan wire using a wire nut.
It is possible, but it is a hassle, and some states would require you to hire an electrician or other licensed professional to do the job. Furthermore, the more connections there are in a circuit, the more there is that can go wrong.
A Tall Enough Room
As a general rule ceiling fan blades should sit at least eight feet above the floor. The clearance is necessary for proper air circulation, and it also ensures that the fan isn’t hanging too low, creating a safety hazard.
Typically, flush mount fans, which sit closer to the ceiling, are installed in rooms that lack sufficient height for a downrod ceiling fan.
As such, switching to a downrod installation may put the blades too close to head height for safety.
You can get shorter downrods (standard downrods come in lengths ranging from two to ten inches), but you have to consider if it is worth changing the installation for an extra two inches or so of length.
Some Fans Come With a Dual Mounting Option
Dual mount fans (amazon link) provide flexibility in installation style and location. They come with mounting hardware for both flush mount and downrod installation.
If your fan has a dual mounting option, and provided your wires are long enough and your ceiling tall enough, switching to downrod installation should be pretty easy.
To do this, you would have the check the packaging the fan came with for the rod and other installation hardware necessary for converting to downrod installation.
If you are unable to locate the packaging, you can purchase replacement parts that match your fan’s model.
Switching the Mounts
Before dismounting the fan, you need to ensure that everything you need for the conversion is available.
Dual mount fans come with all the necessary hardware required for downrod installation, so you can start by locating the packaging and retrieving the necessary items.
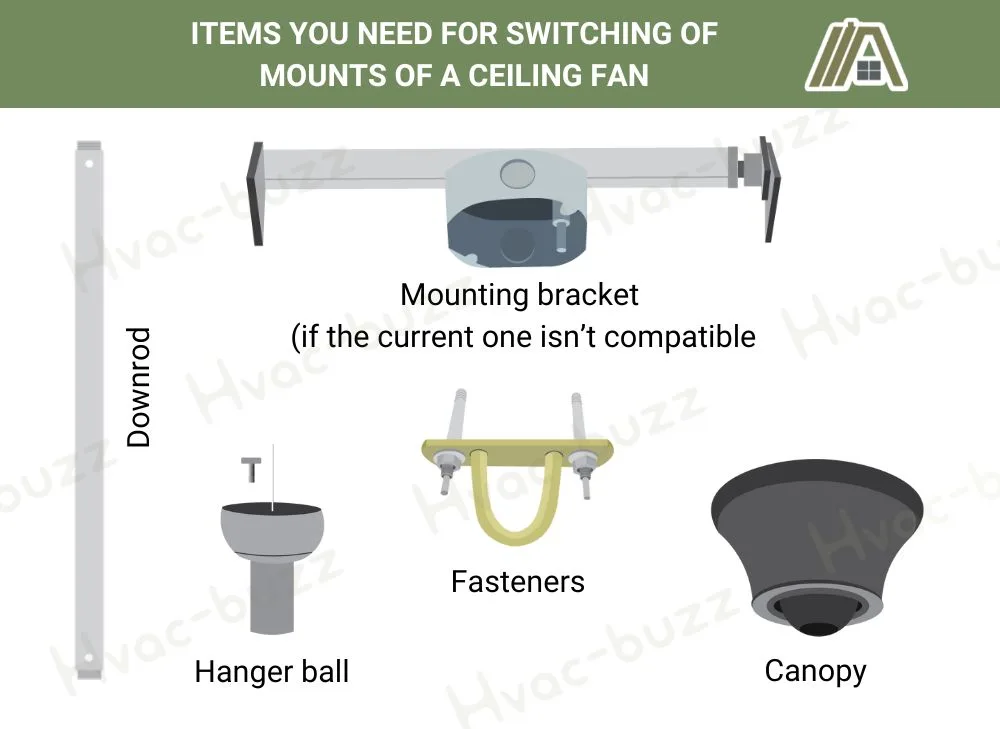
Here are the items you need for the switch:
- Downrod
- Hanger ball
- Fasteners
- Canopy
- Mounting bracket (if the current one isn’t compatible)

If you’ve misplaced the conversion hardware that came with your fan, you can purchase replacement parts at an appliance part store, your local hardware store, or online.
Note that canopies and downrods aren’t universal, so if you are purchasing one, ensure that it matches your fan’s model.
Downrods come in different lengths, so if the rod that came with your fan doesn’t suit your needs you can purchase a longer or shorter replacement rod.
You might also have to get extension wires if yours aren’t sufficient for the length of the downrod you intend to use.
The manufacturer’s instructions will also tell you how to change to downrod installation.
How Do Conversion Kits Work?
If the fan didn’t come with mounting hardware for downrod installation or you’ve misplaced yours, you can purchase a conversion or hanging kit.
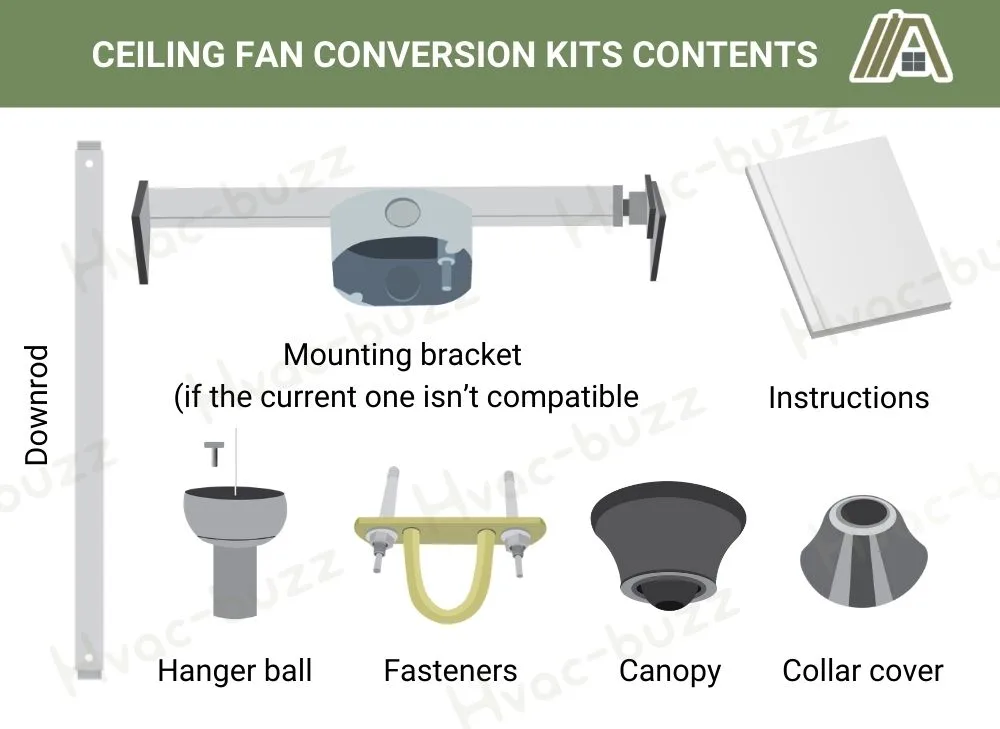
Conversion kits contain the necessary hardware to convert from flush mount to downrod installation.
You can purchase one at an appliance parts store, hardware store, or online.
Conversion kits are mostly sold according to ceiling fan brands. So, ensure that you purchase one that matches not just the brand but the model of your fan as well.
Contents:
- Hanger ball
- Collar cover
- Canopy
- Fasteners (screws and pins)
- Instructions
- Mounting bracket

The content of the kit can vary based on the manufacturer, so yours might not include all these items or it can include additional items.
Downrods differ from one fan to the next. As a result, most conversion kits do not include a downrod and you would have to purchase one separately.
Should You Switch to a Downrod Installation?
Pros
- While a flush mount fan can only be installed on a flat ceiling, downrod fans can be installed on various ceiling types including sloped, angled, vaulted, and flat ceilings.
- With downrod installation, the blades aren’t close enough to the ceiling to affect airflow efficiency. So, they circulate air better than flush mount fans.
- The added length provided by downrods means that the airflow above the fan is less turbulent and the fan is less likely to wobble.
- It is the best mounting option for large or tall rooms and outdoor areas like porches, patios, and gazebos.
- Various rod lengths and styles are available. Thus, you can use one that best suits your room, and it can add to the aesthetic.
Cons
- Downrods aren’t ideal for low ceilings.
- Downrod fans can be more difficult to maintain than flush mount fans.
- They make the ceiling appear shorter, so they might not look good in small rooms with lower ceilings.
- They take up more space than flush mount ceilings.
- Downrod installation requires more mounting hardware than flush mount installation.
Sources
https://www.delmarfans.com/educate/basics/what-size-downrod-do-i-need/
https://www.energystar.gov/products/lighting_fans/ceiling_fans/ceiling_fan_basics#
https://applianceanalysts.com/flush-vs-downrod-ceiling-fan/#
https://www.houseunleashed.com/flush-mount-vs-downrod-ceiling-fan/

