It is common for dryers to let in cold air and ruin your laundry room’s warm and welcoming temperature and potentially even the room temperature of the other parts of the house. On top of causing discomfort, air leaks can cause your bills to shoot through the roof.
There are many possible causes behind this problem and a few easy ways to fix them. You don’t need to worry! Consider this to be your ultimate guide for dealing with dryer vent air leaks.


Dryer vents let cold air in if the damper is stuck open, the seal or caulking is compromised, or there are loose duct joins. Clean the damper flaps of built-up lint and debris. If the flaps are damaged, replace the unit. Reapply caulk or replace the seal. Seal duct joins with metal tape or call a specialist.
Why Do Dryer Vents Let Cold Air In?
There are three main reasons why a dryer vent could be causing you trouble. Luckily the first two are usually easily noticeable and fixable. Let’s look at what they are and what causes them before we get to the third and trickier-to-diagnose potential cause.
Backdraft Damper Flaps Stuck Open
A backdraft damper plays a vital role in preventing the cold air from entering the vent. It should also prevent debris, insects, or rodents from getting into your home through the otherwise unguarded opening. However, if the damper for some reason can’t close properly, you could face some problems.
The most likely reason behind stuck damper flaps is that they are not kept clean. Wind can often bring dust and grime that settles and builds up between the flaps. Lint from the dryer itself can also build up. Both these things cause the damper flaps to stay slightly open.

Alternative causes could be that dirty flaps are sticking together or that a small animal decided to make it its new home and build a nest there.
It is also possible that one or more flaps were bent, broken, or got entirely detached due to extreme weather conditions and the low quality of the product. Depending on the setup by the exit vent, even getting hit by a fast-flying baseball ball (or similar incident) could cause damage.
When lint causes the damper flap to sit slightly raised, then it can easily be caught by gusting winds and then dropped again, creating an annoying tapping or banging sound.
Seal/Caulk on Damper Compromised
Caulking can get compromised if:
- It is low-quality.
- The surface it is applied on was not prepped correctly.
- There are extreme humidity and temperature fluctuations.
- The exterior caulk was applied with an overly thin layer.
Similar to the backdraft damper flaps, the caulking around the damper is also very easy to inspect and fix if needed. If you see that the flaps are clean, closed, and appear to open and close smoothly, it is time to check on the caulking.

Look at the edges of it. If there are any apparent changes and issues with it, such as the caulking is cracking or peeling away, it is most likely not sealing properly. Instead, it allows the cold air to enter the vent and, subsequently, the room.
Dampers also have rubber seals that can be damaged, worn, or slip out of place. You should check this seal to see if it is intact and in the right position to serve its function.
Duct Connections Are Loose
If you checked for both the aforementioned troubles and didn’t find any issues, then the problem probably lies with the ducting. Another telling sign is an unusual amount of dust in the laundry room.
Looking for duct leaks can be difficult because the ducts are relatively long and they run through the hardest-to-reach places of the house.
Firstly, you should ensure that the dryer vent pipe is properly attached to the dryer. Examine if it is not loose or cracked. Also, check that the dryer is not too close to the wall and thus damaging the pipe.
")
Following this initial inspection, try to examine the duct connections and feel for any leaks. If you don’t have access to the ducting or simply can’t find and fix the issue yourself, contact a professional who should be able to perform testing that will help find any sources of leaks in your ducting.
When cold air is coming in through your dryer vent, it can also make the ducts rattle and sound like the dryer is on when it is not.
Solutions to Dryer Vent Cold Draft
If you have noticed that the backdraft damper flaps are stuck open, completely missing, bent, or otherwise damaged, the solution is simple. You can either properly clean them, try to bend them back into place or replace the damper altogether.
It can also be worthwhile to lubricate the flaps if they don’t close properly even after cleaning or if you see that a metal flap is rusted. Make sure you only use non-flammable lubricants that the damper’s manufacturer approves.
Assuming that the flaps don’t seem to be causing any trouble, but you came to the conclusion that the caulking around the damper is for some reason no longer sufficient, you can reapply it in a few easy steps. If it’s the damper seal that’s giving issues, you can usually find an appropriately sized replacement for this.
Firstly, you need to remove the old caulking. You can do so by using a utility knife to cut it away. Make sure the vent is attached correctly, and then clean and prep the space to apply a new layer of caulking.
If you need some extra help troubleshooting the backdraft damper or decide to replace your old one and want to know how to choose, install and maintain your new backdraft damper, check out our ultimate backdraft damper guide. My recommendation is an AC Infinity damper like this one:
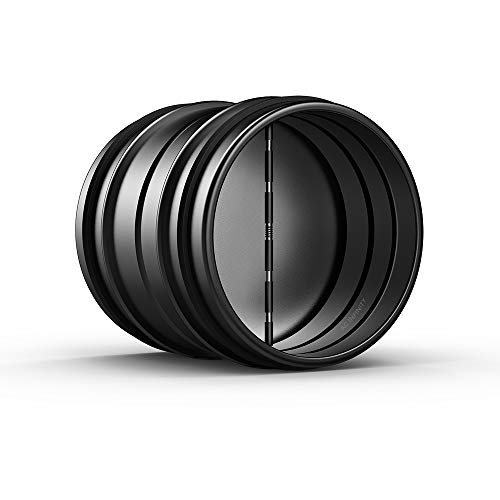
- An antidraft duct insert designed for use with range hoods, bathroom fans and other home HVAC applications.
- Features outer rubber gaskets that create an airtight seal and grip between the damper and ducts.
- Mounts horizontally or vertically to prevent backflow and debris from entering ducting.
- Galvanized steel body with spring-loaded aluminum damper blades that open with minimal airflow.
Last update on 2024-03-27 / Affiliate links / Images from Amazon Product Advertising API
In case you, after a proper examination, suspect that the problem is with the vent’s ductwork, check specifically the duct joints and then try to seal them with foil tape or other recommended duct sealer. Optionally, you can contact a local specialist that will be able to examine and fix your ductwork.
There is one more thing to consider. If the room has an exhaust fan, chances are the air leaks are partially or wholly caused by the fan. If you think this could be the case, read our advice for people who own a fan that is letting in cold air. Note: the exhaust fan and the dryer should not share a vent, so if the fan is contributing, then you should be able to feel the cold breeze coming from the grant grille.
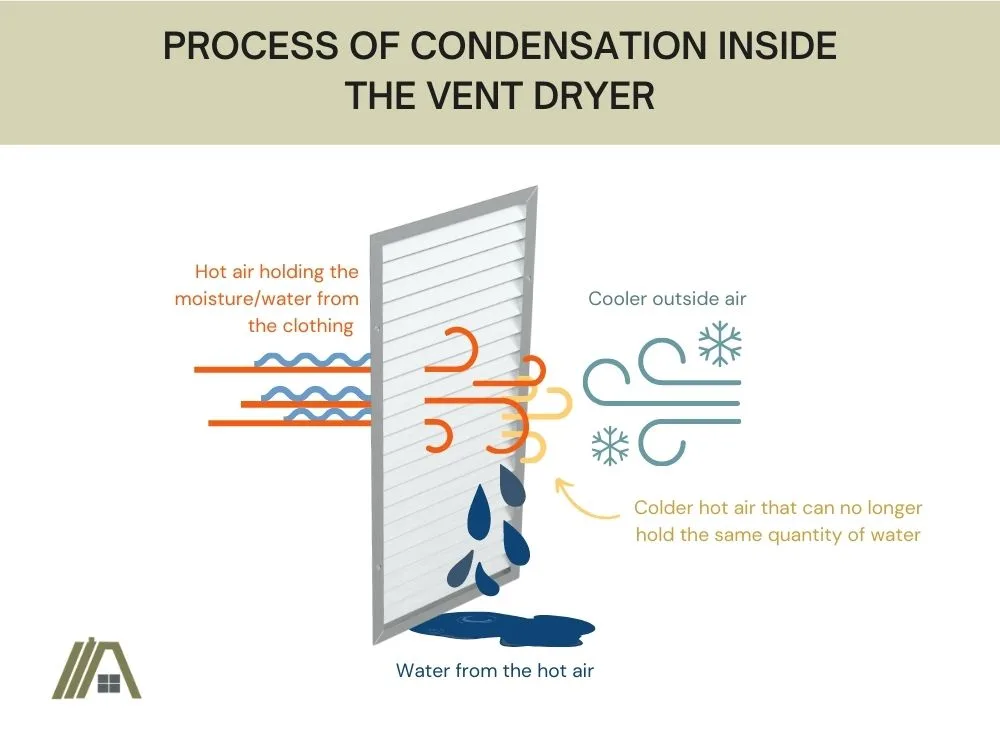
Cold Air Leaks Could Turn Into Water Leaks
Once the dryer is finished the entire duct is filled with moist hot air.
A leaking damper lets cold air in from the outside. This quickly reduces the temperature inside the duct and the moisture in the air will condense on the duct walls.
Depending on how the ductwork is positioned the water will start dripping either into the dryer or out of the grille on the wall.
Alternative Solution: Switch to Condensing Dryer
If you prefer not to worry about any dryer vents altogether, getting a condensing dryer is an ideal option for you.
This dryer doesn’t need a vent because it doesn’t discharge the hot air, which is full of moisture after drying the clothes. Instead, it works on a closed-loop principle where it cools the used air in order to dehumidify it.
Any moisture is captured in a tank. The dry air is subsequently reheated and again used to run it through the clothes. This process repeats until the clothes are completely dry, allowing the ventless dryer for better energy efficiency than a vented dryer.

At the end of the process, all the air condensed into water is either transferred into a tank which is located inside the dryer itself, where it will be stored until you empty it. Alternatively, some dryer models can be connected directly to a drainpipe, meaning any collected moisture can be discharged directly through the drainage system rather than sitting inside a tank until you empty it.
A ventless dryer is an excellent solution for anyone who wants to save energy or who has to install the dryer in a location with no access to a vent pipe. Condensation dryers can be installed anywhere!
The main downside of these dryers is that they usually take longer to dry the clothes than the regular vented dryer. However, the models are constantly improving, and they are becoming faster, larger, and even more energy-efficient than they used to be.
Sources
https://www.kennethaxtpaintingcontractors.com/why-is-my-caulk-cracking-and-splitting/
https://www.servicechampions.net/blog/signs-air-ducts-bad-ductwork/
https://www.thespruce.com/how-ventless-dryers-work-2145837
https://www.familyhandyman.com/project/dryer-vent-cover-repair/
https://basementissues.com/laundry-room-cold/
https://homeguides.sfgate.com/how-to-know-when-to-replace-a-dryer-filter-13768639.html