Although many homeowners may not know it, the dryer belt is an integral component of your dryer. It allows for the dryer drum to rotate so that your clothing can dry evenly. This unsung hero can fail, though, and it is important to know how to fix your dryer belt system.
Once you understand the dryer belt system, it is possible to understand how each of its components can break or malfunction. When the system is understood, repairs can be made more easily and possible damage can be prevented.


Dryer belts slip if worn and stretched or the wrong size. Replacing these belts stop them from slipping. Short-circuiting motors, idler pulley breakage, and weak idler pulley spring tensions can also cause dryer belts to slip. Tension springs can be adjusted but broken motors and pulleys must be replaced.
Configuration of a Dryer Belt System
In order to fully understand why a dryer belt would slip, it is important for you to be able to visualize and understand the system first.
The belt is what causes the drum of your dryer to rotate. The belt is pulled under the bottom of the drum, looped up and around the motor shaft, looped around an idler pulley, and then looped around the entire drum.
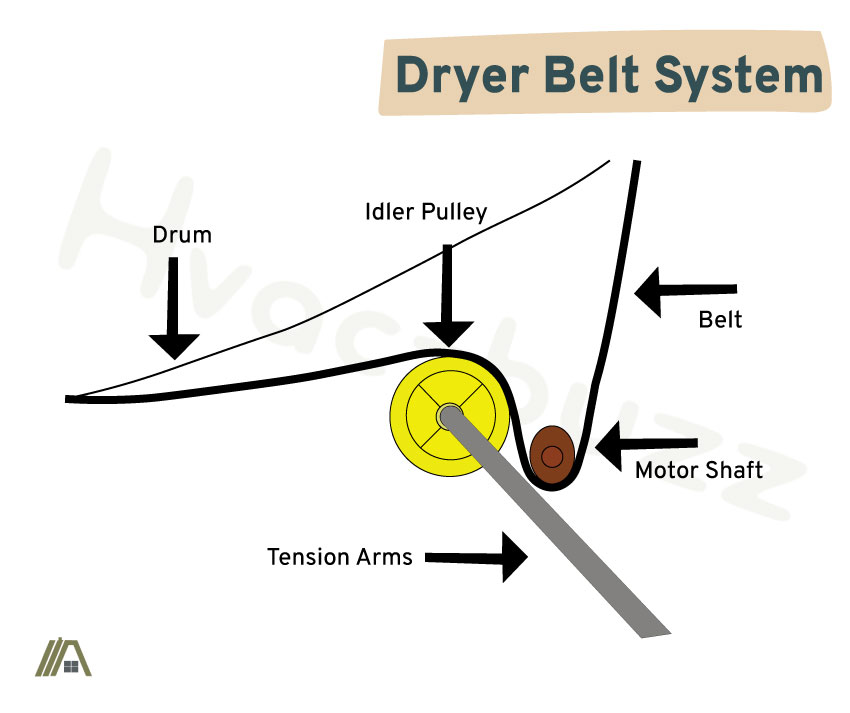

The dryer motor shaft is what allows the belt to move and the idler pulley ensures that the belt is taut. This tension from the idler pulley is how the belt is able to grip the drum (with the help of the ridges) and spin it. The tension allows for the belt to cling to the outside of the drum.
As mentioned, the belt is an important part of the dryer because the rotating of the drum is integral to the drying process. If the belt slipped or broke, the drum would not rotate.
With a stationary drum, the heat would be applied unevenly, which could overheat some of the dryer load, even causing it to burn, and leave some wet. The end result would be an unevenly dry load of laundry.
Stretched or Worn Dryer Belts Slip
As is the case with most appliances, over time, their quality begins to deteriorate. Unfortunately, this is the case with dryer belts. As you use your dryer over time, the belt will begin to stretch and wear.
Although the substance of a dryer belt is tough, it must be malleable so that the belt can navigate through twists and turns through its route. It must be stretchy enough to be taut around the drum, but not so stretchy that it begins to slip.
Most dryer belts last around about eight to twelve years. The lifespan begins to decrease, though, if the dryer is used more often than the usual household. If your dryer loads are soaking wet, this weight can also add to the stress of the dryer belt and decrease its lifespan.
The tension of your dryer belt is very important for the functioning of the dryer belt system. If the belt isn’t tight enough around the drum, the belt is likely to slip and will not be able to perform its function.
One way to tell that your dryer belt is becoming loose is if it begins to sound different over time. Since the sound of the drum rotating is a large portion of the sound that comes from a dryer, a change would be easily heard. If your dryer begins to sound different, your dryer belt may be stretching.
Another way to tell if the dryer belt is stretching out is to test it yourself. Open up the back of your dryer so that the belt is visible. If you give the belt a tug, there should be a very small amount of give to it. If the belt stretches a noticeable amount, it may be failing.
A word of caution, as belts get older, not only do they stretch out, but they also get more brittle. That being said, when you pull on an older dryer belt, it may break.
Solution
Unfortunately, once your dryer belt has been stretched far enough that it slips off, you must replace the entire belt.
This project requires a flat-headed and Phillip’s screwdriver. I recommend the Klein Tools 11-in-1 Screwdriver (amazon link) for its ability to be both types of screwdriver and its high ratings.
, 3 Nut Driver Sizes, Cushion Grip Handle")
- First, you must disconnect the dryer from its power source and move it away from the wall for easy access to the back.
- You must then remove any fasteners attaching the top of the dryer to its base.
- Once the top is free, it must be pried off with a flathead screwdriver.
- Then, disconnect the wires towards the front of the dryer that connect to the door safety switch. This will allow you to disassemble the dryer.
- Next, you must lift up the top of the machine and keep it open as far as it can. This can be done by propping it up with a chair.
- The front panel of the dryer must then be lifted up, removed from the dryer, and set aside.
- Your dryer drum and belt must then be removed carefully so that its weight is balanced.
- You can remove this old dryer belt and use it to find a match for your dryer. The make and model of the dryer can also help in finding the correct dryer belt.
- While the dryer is taken apart, it can be cleaned of dust and lint.
- You can then install the new dryer belt so that it lines up with the marking on the drum.
- The dryer is ready and must then be put back together.
Incorrect Fitment Leads to Slipping
The correct tension of the dryer belt is one of the most important components of the product. If the tension is skewed in any way, the dryer belt becomes useless. Unfortunately, there are several ways for the tension of a dryer belt to become skewed.
One of these ways is that the dryer belt is not fitted correctly. Whether this was a mistake in the installation or the dryer belt is not correct for this make and model, a wrongly-sized dryer belt will slip off of the drum.
A way you can differentiate this problem from the dryer belt stretching over time is if, after this belt is installed, the drum does not spin. For a stretched belt, the drum will spin for the lifespan of the belt but will eventually fail to stay on the drum.
Solution
In this situation, the dryer belt may either need to be adjusted or a new dryer belt must be purchased.
To adjust a dryer belt, open up the dryer as instructed above. Then, look over the dryer belt to see why it is not fitting well. Make sure it is lined up with the mark on the drum.
If the problem is not with the installation of the belt, a new belt may have to be purchased.
Make sure to know the make and model of your dryer when you are shopping for a new belt. Utilizing an employee’s help can also be useful.
Motor Short-Circuiting Can Cause a Belt to Slip
The failure of the belt motor can cause an abrupt halting of the movement of the dryer belt. This abrupt change can cause the belt to slip from its position as it decelerates.


Short-circuiting of the motor can happen in a variety of situations.
The first scenario includes a bad start switch. When the dryer is started with a bad start switch, the switch is stuck in the “run” position and will draw a large amount of current over a longer period of time. This current can cause short-circuiting.
Your dryer’s heating element can also fail and cause short-circuiting.
If your motor has accumulated dirt and other debris in its bearings, or if the bearings are worn out, it can prevent a motor from operating properly and can draw excessive current. This can also cause short-circuiting.
Solution
If the dryer belt motor has short-circuited, it is beyond repair and must be replaced. Following the procedures above to take apart your dryer, you can locate your bad motor, take it out, and replace it with one compatible with your dryer.


For the belt that slipped, it can simply be put back on in the location marked on the dryer drum.
To prevent short-circuiting from happening again, it is important to keep up regular maintenance on your dryer.
Cleaning your motor bearings every so often, especially if the dryer isn’t running at its best, as well as replacing your heating element as it begins to deteriorate can prevent short-circuiting.
Most importantly, it is important to have the correct circuit breaker for your dryer to prevent short-circuiting.
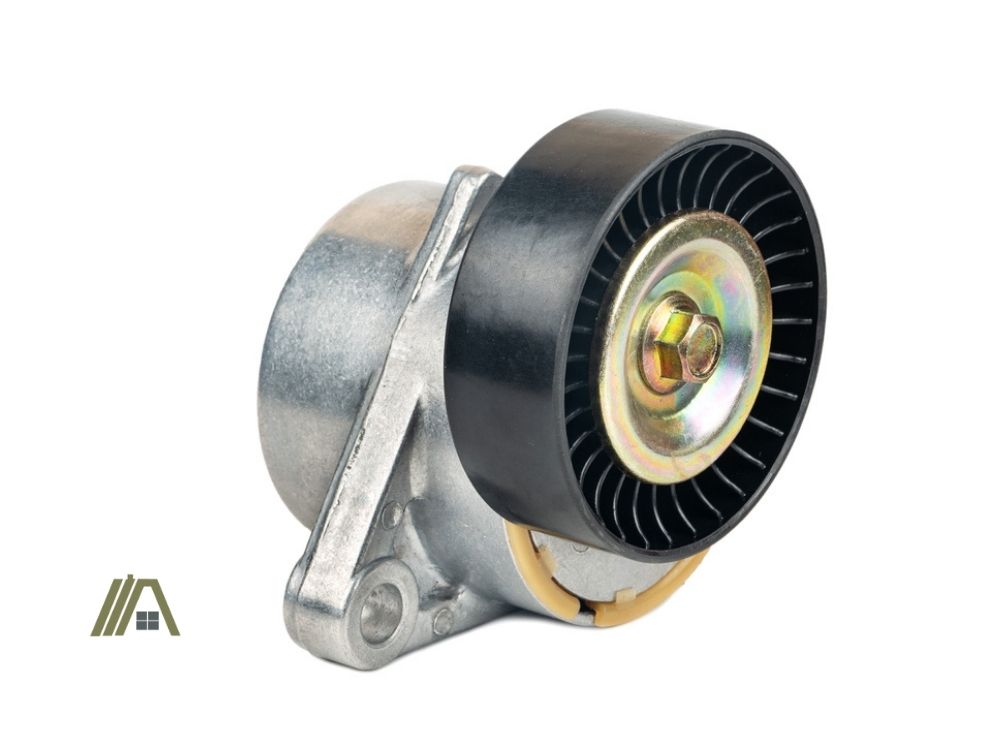
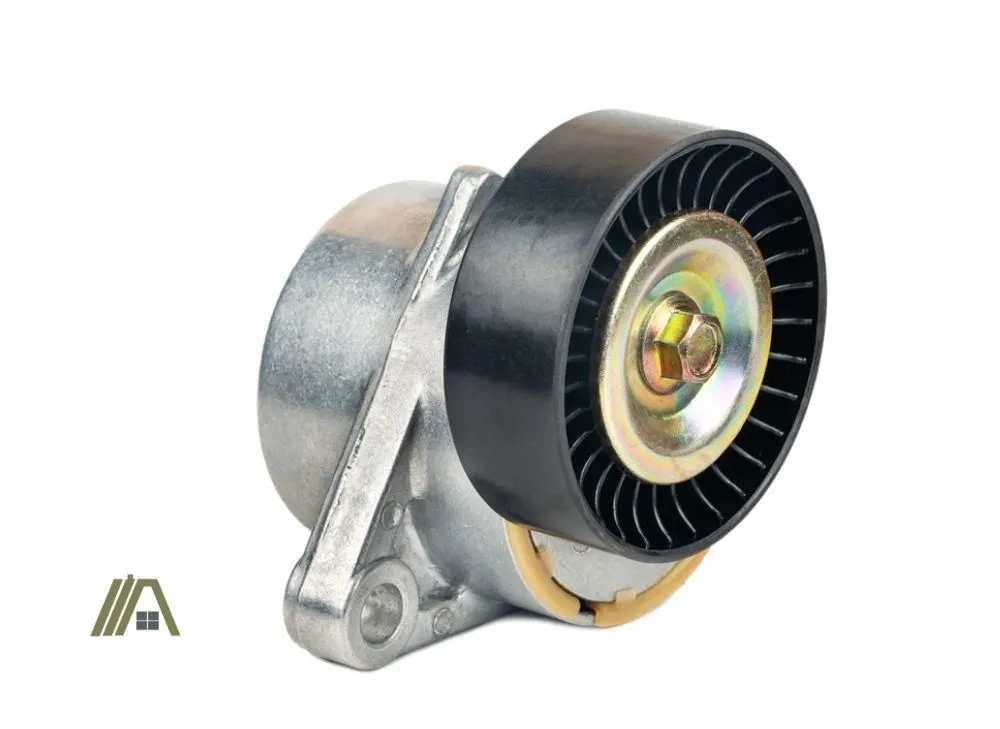
Dryer Belts Slip When Idler Pulleys Break
Because idler pulleys are what keeps dryer belts as taut as possible in order for them to stay in their path and cling to the drum, if the pulley was to break, not only would the track of the belt be altered, but the belt also wouldn’t be pulled taut and would slip.
In order for you to inspect the idler pulley to ascertain which part of the belt system failed, the dryer must be taken apart so that the dryer belt is exposed. Once this is done, the dryer belt must be taken off so the pulley can be inspected.
If there are dents or other noticeable physical damage to the pulley, then the idler pulley is the culprit and must be replaced.
Spinning the pulley can tell you if there is damage that you cannot see easily. When spinning, the pulley should not wobble or make noise and should turn smoothly. If this is happening, the idler pulley should be removed and replaced.
Solution
Just as with dryer belt motors, broken idler pulleys cannot be repaired, they must be removed and replaced.
The dryer must be taken apart so that the dryer belt is exposed. The dryer belt must also be removed for easy access.
Depending on the make and model of your dryer you may be able to replace the wheel itself, or the entire wheel and arm assembly must be replaced.
It is very important, as with the belt and motor, that the idler pulley is specific for your dryer since not all idler pulleys will work for your specific model.
Weak Tension Springs Allow Belts to Slip
It has been said in previous sections that the idler pulley is what allows for the tension in the dryer belt. The tension sustained by the idler pulley is supported by a spring that connects the idler pulley to the base of the dryer.
This spring allows for the idler pulley to be nearly locked in place in its upright position. The spring also allows for the idler pulley to be pulled back so that the belt is removed easily.
If this spring has too much give to it, the idler pulley would be freer to move as the dryer belt rotates. This would decrease the tension in the system and allow for the belt to slip off of its course.
Solution
In this case, the spring must be replaced with one that is stronger and will keep the idler pulley in place.
To do this, the dryer must be taken apart so that the belt is visible. To remove the belt, the idler pulley must be moved to the side so that the spring is slack and the belt can be removed easily.
The spring can then be removed with needle-nose pliers. I recommend the IRWIN VISE-GRIP Long Nose Pliers (amazon link) for their durability and grip strength.
")
A new spring can be installed with the same pliers and the pulley can be moved into its upright position while winding the belt around it.
Sources
https://diy.repairclinic.com/how-to-replace-a-dryer-belt/
https://cementanswers.com/can-a-dryer-belt-stretch-out/
https://www.wikihow.com/Change-a-Clothes-Dryer-Belt
https://homeguides.sfgate.com/causes-circuit-breaker-trip-clothes-dryer-83971.html